Walkthrough: Developing Owner Drawn User Controls - Part 2 (TransLabel and TransPanel's Revenge)
Introduction
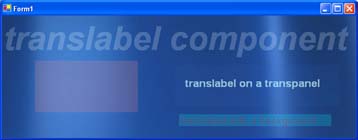
After seeing Microsoft Windows MediaCenter Edition, I really liked the the look of using semi-transparent elements to differentiate areas of the screen. I set off to figure out how to accomplish this sort of behavior using .NET functionality. The good news, it can be done. The bad new, it’s not nearly as fast as the Media Center Edition counterparts since it’s using DirectX behind the scenes. However, with some creating thing and careful layout, you can achieve impressive results with the components that we will develop over the next four articles. (This is part 2 of the series)
What will this article do for you?
Building upon the knowledge acquired while following along in the first article, we will build upon those techniques to add a TransLabel control and fix a serious design flaw with the TransPanel control. Along the way, you will encounter a couple of the gotchas that I ran into along the way and will also find a few additional pieces of information on how to clean up your GDI+ drawing objects to explicitly free the memory that used. If you haven’t done so, please work through the first article, as this one builds heavily upon it.
Initial Setup of our Project Environment
- Open the solution you created in the first part of this series.
-
Creating the
TransPanelComponent - Add a new Component to the
TransControlsproject, call itTransLabel. - View the source for the
TransLabelclass.
Now, remember there are a couple of things we need to do to allow our coding to be a little more production, not to mention, add some strongly typed checking (in addition, improve the overall performance).
- Add prior to
Public Class TransLabelthe following lines:
1
2
3
4
5
6
Option Explicit On
Option Strict On

Imports System.ComponentModel
Imports System.Drawing.Imaging
Imports System.Drawing.Drawing2D
Now, we need to modify the Inherits to reflect the type of control we are basing this new control on. We could approach this a couple of ways. The component could inherit from our previously created Panel control, however, since we don’t need it to be a container and the properties don’t make complete sense when discussing a Label type control, we are going to inherit from a base Label control instead and do some copy and paste to get our new component working.
- Modify the
Inheritsline to the following:
1
Inherits System.Windows.Forms.Label
- Next, we need to modify the label so that we will employ double buffering for the drawing code. Add the following to the
Sub New()method (contained within the Component Designer generated code region after the Add any initialization after theInitalizeComponent()call remark.
1
2
3
Me.SetStyle(ControlStyles.DoubleBuffer, True)
Me.SetStyle(ControlStyles.AllPaintingInWmPaint, True)
Me.SetStyle(ControlStyles.UserPaint, True)
Now copy all of the code from the TransPanel component we built previously to the body of our new TransLabel class (This includes the Opacity property, the OnPaint method, the OnMove method and the member _opacity variable declaration.):
1
2
3
4
5
6
7
8
9
10
11
12
13
14
15
16
17
18
19
20
21
22
23
24
25
26
27
28
29
30
31
32
33
34
35
36
37
38
39
40
41
42
43
44
45
46
47
48
49
50
51
52
53
54
55
56
Private _opacity As Double = 0.1

< Category("Appearance"), DefaultValue(GetType(Double), "0.1"), Description("Gets or Sets the opacity level of the label.") > _
Public Property Opacity() As Double
  Get
    Return _opacity
  End Get
  Set(ByVal Value As Double)
    If Value < 0 OrElse Value > 1 Then
      Throw New ArgumentException("Value must be between 0.00 and 1.00")
    End If
    _opacity = Value
    Me.Invalidate()
  End Set
End Property

Protected Overrides Sub OnPaint(ByVal e As System.Windows.Forms.PaintEventArgs)

  If Me.BackgroundImage Is Nothing Then
    If Not (Parent.BackgroundImage Is Nothing) Then
      e.Graphics.DrawImage(Parent.BackgroundImage, _
        New Rectangle(0, 0, Me.Width, Me.Height), _
        Me.Left, Me.Top, Me.Width, Me.Height, GraphicsUnit.Pixel)
    Else
      e.Graphics.FillRectangle(New SolidBrush(Parent.BackColor), _
        New Rectangle(0, 0, Me.Width, Me.Height))
    End If
  Else
    MyBase.OnPaint(e)
  End If

  Dim attributes As New ImageAttributes
  Dim matrixElements As Single()() = { _
    New Single() {1.0F, 0.0F, 0.0F, 0.0F, 0.0F}, _
    New Single() {0.0F, 1.0F, 0.0F, 0.0F, 0.0F}, _
    New Single() {0.0F, 0.0F, 1.0F, 0.0F, 0.0F}, _
    New Single() {0.0F, 0.0F, 0.0F, CSng(_opacity), 0.0F}, _
    New Single() {0.0F, 0.0F, 0.0F, 0.0F, 1.0F}}
  Dim matrix As ColorMatrix
  matrix = New ColorMatrix(matrixElements)
  attributes.SetColorMatrix(matrix, ColorMatrixFlag.Default, ColorAdjustType.Bitmap)

  Dim bitmap As Bitmap = New Bitmap(Me.Width, Me.Height, PixelFormat.Format24bppRgb)
  Dim g As Graphics = Graphics.FromImage(bitmap)
  Dim brush As Brush = New SolidBrush(Me.BackColor)
  g.FillRectangle(brush, New RectangleF(0, 0, Me.Width, Me.Height))
  brush.Dispose()
  e.Graphics.DrawImage(bitmap, _
    New Rectangle(0, 0, Me.Width, Me.Height), _
    0, 0, Me.Width, Me.Height, GraphicsUnit.Pixel, attributes)

End Sub

Protected Overrides Sub OnMove(ByVal e As System.EventArgs)
  Me.Invalidate()
End Sub
- Now we can build our
TransControlsproject and do some quick testing. Right mouse on theTransControlsproject in the solution explorer. Select build from the menu. - Open our test form (
Demoproject,Form1.vb) in the designer. This will allow us to update the user controls list in the toolbox. - Select the current
TransPanelcontrol in theMy User Controlslist. - Press the delete key to remove it from the list.
- Right mouse in the
My User Controlsarea and selectAdd/Remove Items. - Select the
Browsebutton. - Navigate to where your
TransControlsproject is located and select theTransControls.dll file located in the bin folder. - Select
OK.
Now you should have TransCheckBox, TransLabel and TransPanel listed in the My User Controls toolbox.
- Double click the
TransLabelcomponent to add an instance to your test form.
As you will notice, the control looks amazingly like the TransPanel control. So let’s jump back over to the TransControls project and start the process of making our TransLabel control come to life.
The first thing we need to do, obviously, is to get our label control to actually display a text string to the screen. (We are going to do a couple of things wrong along this process. I want to show the thinking process along with the possible trial and error that may be involved. So please bear with me.)
- Within the
OnPaintmethod, we are going to add to the end of the code block the following:
1
2
e.Graphics.DrawString(MyBase.Text, MyBase.Font, _
  New SolidBrush(MyBase.ForeColor), 0, 0)
- This should cause our label component to display the text value (the one handled by our base class (Label) using the base class font and fore color at the coordinates 0, 0 (within the control).
- Build the project and see how it looks in our test form.
As expected, the control now draws the text properly. Well, maybe not properly, since a Label control allows you to specify a TextAlign property for how the text will be displayed within the control. Let’s fix this. First, we need to figure out the size of the text we are going to draw. We do this by using the MeasureString method of the Graphics object. Next, using the information about the size of the string and the size of the drawing area, we can determine where to draw the string on the screen.
- Add the following code prior to the
DrawStringmethod we added previously.
1
2
3
4
5
6
7
8
9
10
11
12
13
14
15
16
17
18
19
20
Dim x, y As Integer
Dim s As SizeF = e.Graphics.MeasureString(MyBase.Text, MyBase.Font)

Select Case MyBase.TextAlign
  Case ContentAlignment.TopLeft, ContentAlignment.TopCenter, ContentAlignment.TopRight
    y = 0
  Case ContentAlignment.MiddleLeft, ContentAlignment.MiddleCenter, ContentAlignment.MiddleRight
    y = CInt(Me.Height - s.Height) \ 2
  Case Else
    y = CInt(Me.Height - s.Height)
End Select

Select Case MyBase.TextAlign
  Case ContentAlignment.TopLeft, ContentAlignment.BottomLeft, ContentAlignment.MiddleLeft
    x = 0
  Case ContentAlignment.TopCenter, ContentAlignment.MiddleCenter, ContentAlignment.BottomCenter
    x = CInt(Me.Width - s.Width) \ 2
  Case Else
    x = CInt(Me.Width - s.Width)
End Select
- Modify the
DrawStringmethod by changing the two zeros at the end of the method to x and y). - Build the project and let’s do some more testing.
You should now be able to modify the TextAlign property of the TransLabel control and the text being drawn will move accordingly.This is all well and good, but your saying to yourself that we are creating a Semi-Transparent label control. I don’t see how this is any different than a regular Label control, other than our background can be set using the Opacity property. You would be correct in your observation. Now, there are a couple of things that we need to accomplish in order to flush our our TransLabel control.
First, we may not want to have a semi-transparent background and secondly, we want to make the text being drawn to be semi-transparent (according to the Opacity property). Let’s get back to work.
Let’s first work with the issue of not placing the background portion of the label. To do this, we will take advantage of the fact that you can specify Transparent as the background color. We will modify the OnPaint method to check for the backcolor property being set to Transparent and draw the background accordingly. In order to accomplish this, all we need to do is remove the portion of the code that draws our semi-transparent bitmap over the base background image we copied from the controls parent region.
- Add the following
If/Thenconstruct around the code that handles our opacity drawing code (before theDimattributes… and code thate.Graphics.DrawImage…). The code will now look like the following:
1
2
3
4
5
6
7
8
9
10
11
12
13
14
15
16
17
18
19
20
21
22
23
24
25
26
If Not MyBase.BackColor.Equals(Color.Transparent) Then

  Dim attributes As New ImageAttributes

  Dim matrixElements As Single()() = { _
    New Single() {1.0F, 0.0F, 0.0F, 0.0F, 0.0F}, _
    New Single() {0.0F, 1.0F, 0.0F, 0.0F, 0.0F}, _
    New Single() {0.0F, 0.0F, 1.0F, 0.0F, 0.0F}, _
    New Single() {0.0F, 0.0F, 0.0F, CSng(_opacity), 0.0F}, _
    New Single() {0.0F, 0.0F, 0.0F, 0.0F, 1.0F}}

  Dim matrix As ColorMatrix
  matrix = New ColorMatrix(matrixElements)
  attributes.SetColorMatrix(matrix, ColorMatrixFlag.Default, ColorAdjustType.Bitmap)

  Dim bitmap As Bitmap = New Bitmap(Me.Width, Me.Height, PixelFormat.Format24bppRgb)
  Dim g As Graphics = Graphics.FromImage(bitmap)

  Dim brush As Brush = New SolidBrush(Me.BackColor)
  g.FillRectangle(brush, New RectangleF(0, 0, Me.Width, Me.Height))
  brush.Dispose()

  e.Graphics.DrawImage(bitmap, New Rectangle(0, 0, Me.Width, Me.Height), _
    0, 0, Me.Width, Me.Height, GraphicsUnit.Pixel, attributes)

End If
- Build the project and test the changes. By setting the
BackColortoTransparent, the opacity value is now ignored and the control will be truly transparent.
At this point, we really haven’t done anything that the existing Label control isn’t capable of doing already. Now, time to finish what we set out to do, that was to set out and create a semi-transparent label control.
- Modify the text drawing code to look like the following:
1
2
3
4
5
6
7
8
9
10
11
12
13
14
15
16
17
18
19
20
21
22
23
24
25
26
27
28
29
30
31
32
33
34
35
36
37
38
39
40
41
42
43
44
45
46
47
48
49
50
51
52
53
54
55
56
57
58
59
60
61
62
63
64
65
66
67
If MyBase.Text.Length > 0 AndAlso _opacity > 0 Then

  Dim transparency As Color
  If MyBase.BackColor.Equals(Color.Cyan) Then
    transparency = Color.Blue
  Else
    transparency = Color.Cyan
  End If

  Dim x, y As Integer
  Dim s As SizeF = e.Graphics.MeasureString(MyBase.Text, MyBase.Font)

  Select Case MyBase.TextAlign
    Case ContentAlignment.TopLeft, ContentAlignment.TopCenter, ContentAlignment.TopRight
      y = 0
    Case ContentAlignment.MiddleLeft, ContentAlignment.MiddleCenter, ContentAlignment.MiddleRight
      y = CInt(Me.Height - s.Height) \ 2
    Case Else
      y = CInt(Me.Height - s.Height)
  End Select

  Select Case MyBase.TextAlign
    Case ContentAlignment.TopLeft, ContentAlignment.BottomLeft, ContentAlignment.MiddleLeft
      x = 0
    Case ContentAlignment.TopCenter, ContentAlignment.MiddleCenter, ContentAlignment.BottomCenter
      x = CInt(Me.Width - s.Width) \ 2
    Case Else
      x = CInt(Me.Width - s.Width)
  End Select

  Dim textAttributes As New ImageAttributes
  Dim colorMap As New ColorMap

  colorMap.OldColor = transparency
  colorMap.NewColor = Color.FromArgb(0, 0, 0, 0)

  Dim remapTable() As ColorMap = {colorMap}
  textAttributes.SetRemapTable(remapTable, ColorAdjustType.Bitmap)

  Dim matrixElements As Single()() = { _
    New Single() {1.0F, 0.0F, 0.0F, 0.0F, 0.0F}, _
    New Single() {0.0F, 1.0F, 0.0F, 0.0F, 0.0F}, _
    New Single() {0.0F, 0.0F, 1.0F, 0.0F, 0.0F}, _
    New Single() {0.0F, 0.0F, 0.0F, CSng(_opacity), 0.0F}, _
    New Single() {0.0F, 0.0F, 0.0F, 0.0F, 1.0F}}

  Dim matrix As New ColorMatrix(matrixElements)

  textAttributes.SetColorMatrix(matrix, ColorMatrixFlag.Default, ColorAdjustType.Bitmap)

  Dim textLayer As Bitmap = New Bitmap(Me.Width, Me.Height, PixelFormat.Format24bppRgb)

  Dim brush As Brush = New SolidBrush(transparency)

  g.FillRectangle(brush, rect)
  brush.Dispose()
  brush = New SolidBrush(Me.ForeColor)
  g.DrawString(MyBase.Text, Me.Font, brush, x, y)
  brush.Dispose()
  g.Dispose()

  e.Graphics.DrawImage(textLayer, rect, 0, 0, Me.Width, Me.Height, GraphicsUnit.Pixel, textAttributes)

  textLayer.Dispose()
  textAttributes.Dispose()

End If
There’s a lot going on here. First, we are checking to see that the opacity value is greater than 0 and that we actually have some text to draw. Next, we need to figure out what out transparency color will be (to mask the area around the text being drawn, since we want to only deal with the text itself). The next portion of the code will be where we will be drawing the text on the control. Now here’s where it starts to get a little tricky. Just like we did previously with the background portion of the control, we will be creating an attribute that will be used to draw this image upon the control surface. In addition to the ColorMatrix (which handles the semi-transparency drawing), we will also be handling a color remap in order to do our mask drawing (to only draw the text itself, removing the background). Once we’ve got our attribute figured out, we will then create a new bitmap, fill in it’s background with our transparency color and, finally, draw the text string using the specified ForeColor. Now that we have our image created in memory, we will finally draw it upon the controls surface using the attribute we’ve created. Finally, let’s do some cleanup of our drawing tools by disposing those that expose a Dispose() method.
To complete this control, we will make a few other modifications.
- Add the following line to the beginning of the
OnPaintmethod.
1
Dim rect As New Rectangle(0, 0, Me.Width, Me.Height)
Since we need to know the rectangle area in several places within the code, we can save ourselves the creation of a rectangle structure (which is minimal, but let’s look at this from a maintenance standpoint). Now, everywhere in this method where we were creating a new rectangle of this size, replace it with our new rect variable.
- Next, we need to address the fact that we are checking to see if this controls background image is being set and draw the control accordingly. Although we aren’t getting an error because of the non-existence of a
BackgroundImageproperty (which I believe is because the base Control class has one), we need not check this since a Label control does not provide aBackgroundImageproperty. So let’s remove this check. - Finally, let’s modify the section that draws the background layer to also check that the opacity value is greater than 0.
- Build the project and test the control.
Since we are testing our new TransLabel control, let’s make a copy of it and past it within the TransPanel control we built during the first article. Hmmm… it’s not working correctly. Why is this?
The reason is the fact that we are relying on the fact that our parent control has a BackgroundImage set to something. The problem here is that our TransPanel control doesn’t actually have a background image. We are just drawing on the controls surface in order to owner draw what we want it to look like. Your saying to yourself, this should be simple to fix… right?
Let’s jump back to the TransPanel class and make a couple of changes.
- Add the following to the beginning of the
OnPaint()method.
1
Dim rect As New Rectangle(0, 0, Me.Width, Me.Height)
- Next, make all the changes where we are creating a new rectangle on the drawing methods to use this new variable (where appropriate).
- And while where in cleanup mode, we need to add the following just prior to the End Sub:
1
2
3
g.Dispose()
bitmap.Dispose()
attributes.Dispose()
Before we continue, build the TransControls project and test in our demo project.Now, let’s fix the problem. Since all we need to do is have the backgroundImage property set to what we are drawing, we will need to modify the OnPaint method to draw onto a memory bitmap and then set the BackgroundImage property accordingly.
- Add the following to the top of the
OnPaintmethod.
1
Dim memoryBitmap As New Bitmap(Me.Width, Me.Height, PixelFormat.Format24bppRgb)
This will provide us with a base surface to draw upon. Now, everywhere where we are using e.Graphics.xxxx, we need to modify to draw upon a m reference that will draw upon the memoryBitmap image.
- Add the following code just after the creation of the
memoryBitmapvariable.
1
Dim m As Graphics = Graphics.FromImage(memoryBitmap)
- Now, modify all the usage of
e.Graphics.tom.within theOnPaintmethod. - Finally, we will use our new
memoryBitmapto set theMyBase.BackgroundImageproperty. - Build the project and test our changes.
Add another TransPanel to the test form. Hmm… why does it keep flickering? Wait for it… wait a little longer…. bham! a message box from Visual Studio .NET pops up and lets us know that we’ve run “Out of memory.” Well, isn’t that nice. So what did we do wrong?
The answer to that is the fact that we are setting the background image to a new value within the OnPaint event. What’s the problem with that? Well, whenever the background image changes, the control becomes invalidated, which means the OnPaint event will fire again. We’ve caused an infinite loop to occur, which causes a stack overflow and thus the out of memory exception. How doe we fix this?
Well, obviously, we need to move our drawing code outside of the OnPaint method. Doing so, we will need to manually watch for specific events to occur in order to make sure that the background image is updated accordingly. The side effect to this is the fact that the BackgroundImage will now pretty much be a read-only property, since we will be recreating it on the fly based on other property values. This means that consumers of this control will no longer be able to specify a background image, which shouldn’t be a problem, since the goal here is to create a semi-transparent control. So, we can now remove the check to see if there is a background image specified (since there now will be) and it allowing the base class to handle the drawing.
- Remove the
If/Thencheck to see if theMyBase.BackgroundImageis set. - Change the method definition from:
1
Protected Overrides Sub OnPaint(ByVal e As System.Windows.Forms.PaintEventArgs)
To:
1
Private Sub CreateBackgroundImage()
- Modify the OnMove method by removing
Me.Invalidate(). - Add
CreateBackgroundImage()to theOnMovemethod. - Do the same within the
Property SetforOpacity. - Build the project and test.
Hmmm… we are getting an error saying that “Object reference not set to an instance of an object”. This actually makes sense in a twisted or of way. You have to first understand how controls work within .NET. Whenever a control is created it goes through a couple of stages before actually being displayed on the screen. What is happening here is that the Opacity property is being set prior to the control being added to the container. So what can we do to fix this?
Since we need to modify the background image whenever the opacity is set, we need to obviously leave this code in place. The easiest way (although it might not be the most elegant) is to wrap the CreateBackgroundImage() method with a Try/Catch block. This way, whenever the component is created, it will still try to do the CreateBackgroundImage (which will be ignored due to an error occurring) and once the component is created, the method will then work as expected.
- Add an empty
Try/Catch/End Tryblock around all of the code within theCreateBackgroundImagemethod. - Build the control and test.
You will find that the control is drawn using the background color and only is draw as we expect when we set the Opacity property or actually move the control on the form. We now need to handle a couple of other events in order to update the background image upon these events occurring. We will need to handle Resize, BackColorChanged, and ParentBackgroundImageChanged.
- Using the drop down lists at the top of the code pane, select TransPanels Overrides on the left and on the right, find and add
OnResize,OnBackColorChanged, andOnParentBackgroundImageChanged. - Add a call to the
CreateBackgroundImagewithin each of these methods. - You will also want to modify each of these methods so that they call upon the base version of the method. For example, the
OnMOvemethod should look like this once you make all of the changes.
1
2
3
4
Protected Overrides Sub OnMove(ByVal e As System.EventArgs)
  CreateBackgroundImage()
  MyBase.OnMove(e)
End Sub
This gets us most of the way there. We also need to make sure the background image is created upon the creation of this control. The initial problem is the fact that we obviously can’t do this during New() since we will have the same problem as the one we had with the Opacity property being set. This all happens before the control is actually created and housed within a parent control. Luckily, the framework provides us with a override for this occasion.
- Add the following to the
TransPanelclass.
1
2
3
4
Protected Overrides Sub OnCreateControl()
  CreateBackgroundImage()
  MyBase.OnCreateControl()
End Sub
- Build the control and test.
Now, if you add a TransLabel control to the TransPanel control, it works as expected.
Conclusion
This wraps up the second installment to this series. As always, I’m open to any suggestions for improving this and future articles. The next article(s), we will build further upon this article by adding custom drawn check box and button controls. I will also be creating a TransImage control which should wrap up the series nicely by creating a user interface that looks somewhat like the Windows Media Center Edition interface.
See you in the next installment.